Setting up a live DJ sound system, organizing a mobile DJ setup for Indian weddings, or assembling a heavy bass competition rig is exciting.
However, few things are as heartbreaking as seeing smoke drift out of an expensive subwoofer cabinet right in the middle of a packed dance floor.
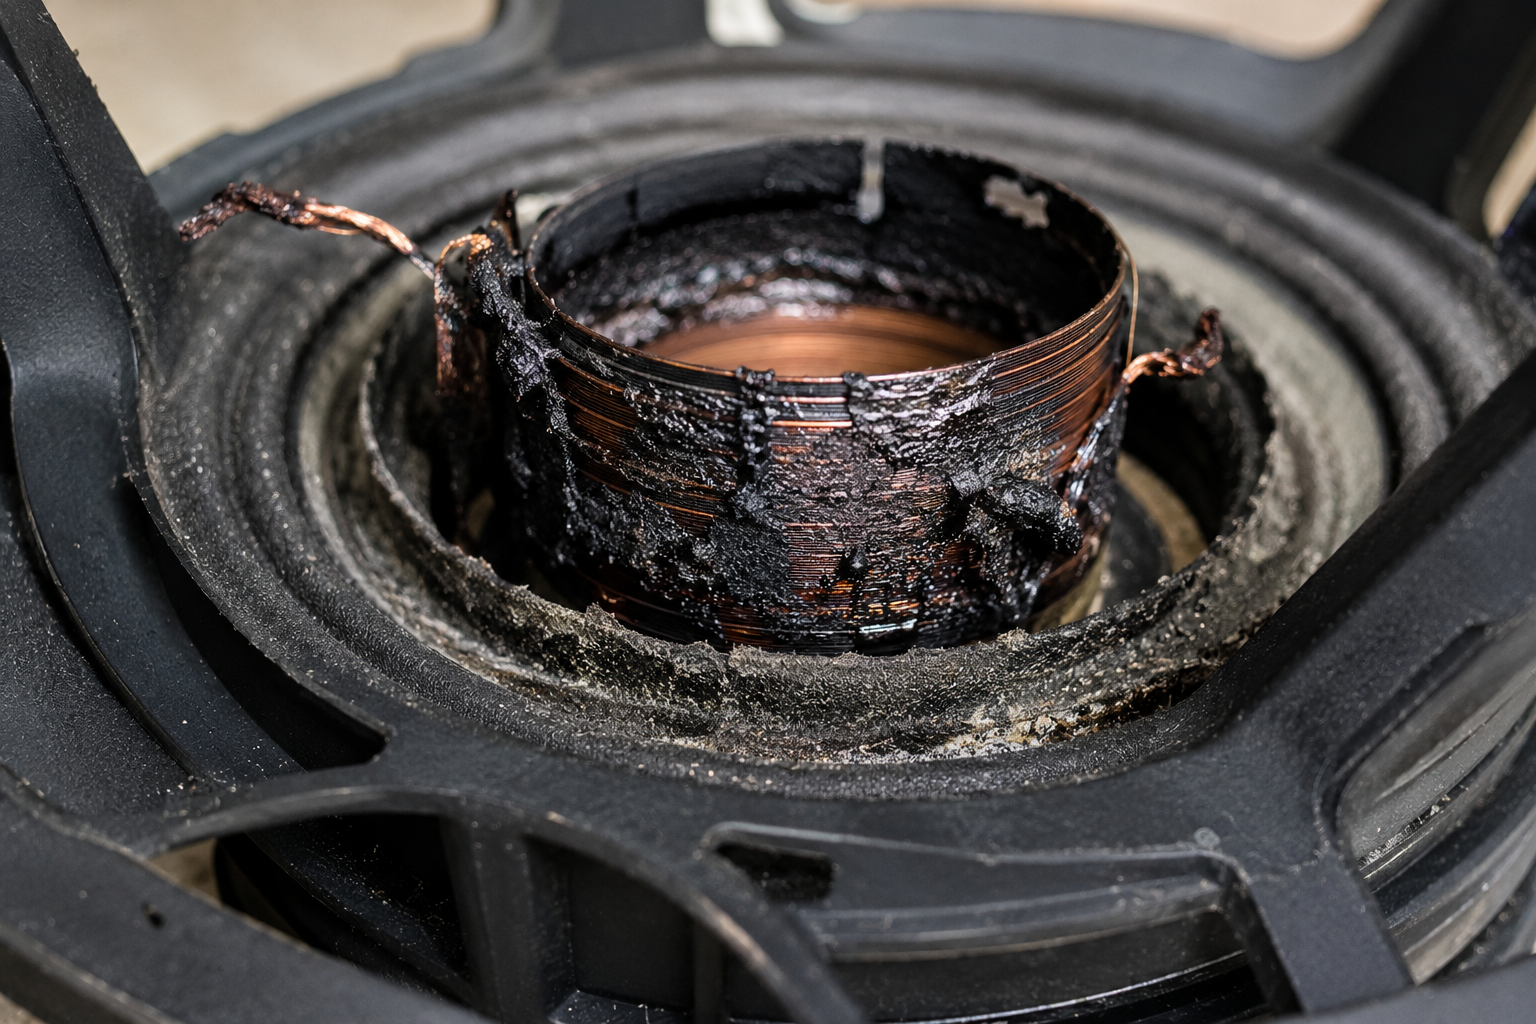
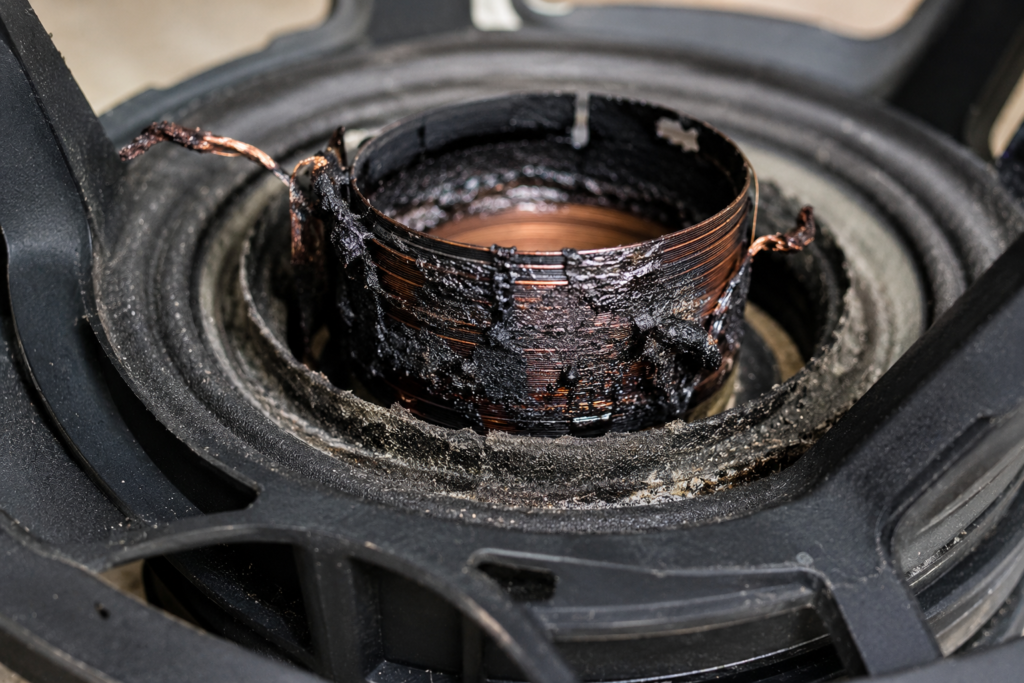
The primary reason for this failure is a burnt voice coil, a common issue that occurs when audio equipment is incorrectly configured.
Many beginners believe that buying high-wattage speakers and connecting them to any available amplifier is sufficient. Others assume that using a low-power amplifier protects high-wattage speakers from damage.
Both assumptions are incorrect and can lead to expensive repair bills. This guide explains how to match amplifiers and speakers without burning out voice coils, helping you understand how electrical ratings translate into reliable, high-quality audio performance.
The Core Problem: Why Do Voice Coils Burn Out?
A speaker driver operates through an electromagnetic voice coil suspended inside a permanent magnet structure. When the amplifier transmits an electrical audio signal through this coil, it generates a magnetic field.
This field interacts with the permanent magnet, moving the speaker cone back and forth to compress air and create sound waves.
This process is not entirely efficient, as a significant portion of the electrical energy sent to a speaker is converted into heat rather than sound.
If the voice coil generates more heat than it can dissipate, its protective insulation melts, causing the wire turns to short-circuit. This leads to a total failure of the speaker component.
Voice coils generally burn out due to two main conditions: excessive clean power or amplifier clipping.
1. Excessive Clean Power (Overpowering)
This occurs when an exceptionally powerful amplifier runs at a high volume for an extended duration, sending more thermal energy than the speaker is rated to handle. The heat accumulates over time until the adhesive or insulation fails.
2. Amplifier Clipping (Underpowering and Distortion)
This is a more frequent cause of damage in the DJ community. When an amplifier lacks the necessary power to deliver the requested volume level, it runs out of voltage headroom.
Instead of outputting a clean, smooth sine wave, the top and bottom of the waveform are flattened into a square shape, a state known as clipping.
A clipped signal forces the speaker cone to hold its outermost position momentarily instead of moving smoothly back and forth. Without air movement to cool the voice coil, heat builds up rapidly.
Additionally, a clipped square wave delivers up to twice the effective power of a clean sine wave of the same peak amplitude, concentrating destructive thermal energy directly within the voice coil.
Key Specifications Explained Simple
To establish a safe connection between audio components, it is essential to understand specific ratings found on technical spec sheets.
RMS Power vs. Program Power vs. Peak Power
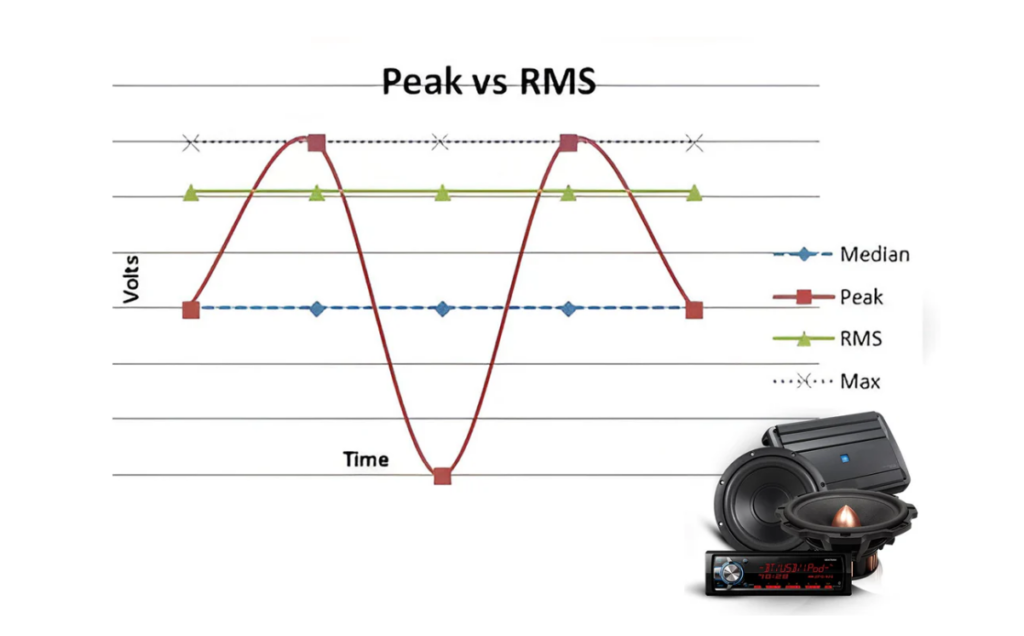
- RMS (Root Mean Square) Power: This represents the continuous power a speaker can safely handle over long periods. It is the most reliable metric for planning a setup.
- Program Power (Continuous/Music Power): What is it? This value is typically double the RMS rating and represents the speaker’s ability to handle real-world music signals, which fluctuate naturally rather than remaining a constant tone.
- Peak Power (Max Power): This is the absolute highest wattage a speaker can handle for fractions of a second during sudden peaks, such as a sharp drum hit. Operating equipment near this limit will cause rapid damage.
Understanding Impedance (Ohms)
Impedance represents the electrical resistance a speaker presents to an amplifier’s power flow, measured in Ohms ($\Omega$). Most professional DJ sound system speakers operate at 8 Ohms or 4 Ohms. Amplifiers alter their output wattage depending on the impedance load connected to them. A lower resistance allows more current to flow from the amplifier.
Amplifier and Speaker Matching Chart
The chart below outlines optimal pairings for professional standard 8-Ohm passive speakers across common Indian DJ applications, ensuring sufficient clean headroom without overloading the voice coils.
| Speaker Type & Application | Speaker RMS Rating | Speaker Program Rating | Ideal Amplifier Output (Per Channel) | Safe Working Range (Per Channel) |
| Small Indoor / Vocal Monitors | 200 Watts @ 8$\Omega$ | 400 Watts @ 8$\Omega$ | 400 Watts @ 8$\Omega$ | 300 – 400 Watts @ 8$\Omega$ |
| Medium Hall / Mid-High Tops | 400 Watts @ 8$\Omega$ | 800 Watts @ 8$\Omega$ | 800 Watts @ 8$\Omega$ | 600 – 800 Watts @ 8$\Omega$ |
| Standard Club / Outdoor Tops | 600 Watts @ 8$\Omega$ | 1200 Watts @ 8$\Omega$ | 1200 Watts @ 8$\Omega$ | 900 – 1200 Watts @ 8$\Omega$ |
| High-Power DJ Tops / Mid-Bass | 800 Watts @ 8$\Omega$ | 1600 Watts @ 8$\Omega$ | 1600 Watts @ 8$\Omega$ | 1200 – 1600 Watts @ 8$\Omega$ |
| Dual-15 Professional DJ Cabinets | 1000 Watts @ 4$\Omega$ | 2000 Watts @ 4$\Omega$ | 2000 Watts @ 4$\Omega$ | 1500 – 2000 Watts @ 4$\Omega$ |
| Heavy Tour Grade Subwoofers | 1200 Watts @ 8$\Omega$ | 2400 Watts @ 8$\Omega$ | 2400 Watts @ 8$\Omega$ | 1800 – 2400 Watts @ 8$\Omega$ |
| High-Output Bass Competition Sub | 1500 Watts @ 8$\Omega$ | 3000 Watts @ 8$\Omega$ | 3000 Watts @ 8$\Omega$ | 2200 – 3000 Watts @ 8$\Omega$ |
The Golden Rule of Audio Matching: Aim to use an amplifier that can deliver 1.5 to 2 times the RMS power rating of your speaker at the same impedance.
This configuration provides 3dB of headroom, preventing the amplifier from clipping while maintaining clean signal delivery. Consider using an amplifier speaker matching calculator tool online to verify specific custom calculations.
Amplifier Speaker Connection Diagram and Wiring Math
When connecting multiple cabinets to a single amplifier channel, the total system impedance changes depending on your configuration. This modifies the load seen by the amplifier and dictates the power delivery.
Parallel Wiring (The Standard DJ Method)
In a parallel configuration, you connect the amplifier output to the first speaker, and then link that speaker directly to a second one using a Speakon-to-Speakon cable. This configuration lowers the total resistance, allowing the amplifier to deliver higher output.
The formula for calculating the combined impedance of two identical speakers in parallel is:
$$\text{Total Impedance} = \frac{\text{Speaker Impedance}}{\text{Number of Speakers}}$$
- Connecting two 8-Ohm speakers in parallel results in a 4-Ohm total load ($8 / 2 = 4\Omega$).
- Connecting four 8-Ohm speakers in parallel results in a 2-Ohm total load ($8 / 4 = 2\Omega$).
If your amplifier delivers 1200 Watts per channel into a 4-Ohm load, connecting two 8-Ohm speakers in parallel shares that total output evenly, providing 600 Watts to each speaker cabinet. Refer to an amplifier speaker connection diagram for your specific hardware when wiring up large stage setups.
Series Wiring
Series wiring connects speakers end-to-end, which increases the total resistance. The formula is straightforward:
$$\text{Total Impedance} = \text{Impedance 1} + \text{Impedance 2}$$
Linking two 8-Ohm speakers in series creates a 16-Ohm load. This configuration reduces the amplifier’s power delivery significantly and is rarely used in high-output pro audio setups, though it remains common when matching speakers to amp car audio systems.
Step-by-Step System Matching Guide
Follow these practical steps when configuring or purchasing equipment to ensure long-term stability:
- Identify the Speaker’s True RMS Rating: Locate the specification plate on the rear of your speaker cabinet or within the user manual. Look specifically for the RMS rating, ignoring any high “Peak” or “Max” marketing numbers.
- Determine the Nominal Impedance: Identify if the cabinet is rated at 4 Ohms, 8 Ohms, or 16 Ohms. Most standard single-speaker professional cabinets operate at 8 Ohms.
- Calculate Your Target Power Requirement: Multiply the speaker’s RMS wattage by 1.5 for basic use, or by 2.0 for demanding applications like heavy bass monitoring. For example, a 600W RMS speaker is best paired with an amplifier that delivers 900W to 1200W at 8 Ohms.
- Check the Amplifier Specification Sheets: Verify the amplifier’s continuous RMS output at your calculated target impedance load. Ensure the model can deliver the required wattage cleanly without entering its red clip zone. For a portable offline reference, download a matching amplifier to speakers guide PDF.
Real-World Audio Performance and Sound Expectations
When an amplifier is correctly matched to speakers using the 1.5x to 2x RMS rule, the acoustic improvement is noticeable. The bass notes deliver a tight, immediate punch rather than a muddy rumble, while vocals remain clear and prominent without harsh high frequencies.
This clarity stems from maintaining adequate headroom. High-transient sound events, such as a sharp kick drum punch or a sudden bass drop, demand immediate bursts of power. A properly matched system handles these peaks cleanly, whereas an underpowered amplifier clips instantly, muddying the sound and risking damage to the voice coils.
Build Quality and Protective System Limits
Modern professional amplifiers include integrated protection circuitry designed to safeguard connected components. When selecting gear, look for units featuring built-in clip limiters, over-current protection, and thermal monitoring.
Additionally, using an external digital signal processor (DSP) allows you to set precise digital limiters. By setting the maximum voltage threshold to match your speakers’ exact RMS limits, you can prevent accidental damage even if an operator pushes the mixer faders too high during an event.
Advantages and Disadvantages of Proper Pro Audio Matching
Advantages
- Significantly Extended Equipment Lifespan: Eliminates the thermal build-up that destroys voice coils.
- Superior Clarity: High headroom ensures zero audio distortion at maximum output levels.
- Reliable Performance: Reduces thermal shutdown risks during long events.
Disadvantages
- Higher Initial Cost: Amplifiers with higher headroom are heavier and more expensive.
- Requires Setup Knowledge: Demands attention to manual wiring math during connection.
Indian Market Pricing and Value Analysis
In India, configuring an amplifier and speaker Set price requires balancing budget constraints with reliability. Opting for cheaper, unbranded amplifiers with poorly regulated power supplies often leads to premature failures and expensive speaker repairs.
Investing in reliable, branded amplification provides better long-term value. For mid-range mobile DJ setups, pairing a high-quality dual-channel power amplifier with two matched 15-inch professional tops typically ranges between ₹45,000 and ₹85,000 depending on the exact brand tier. This investment ensures your system performs reliably across multiple event seasons without requiring expensive re-coiling services.
Who Should Follow This Guide?
- Mobile DJ Operators: Professionals managing wedding receptions, birthday parties, and community gatherings who require their sound systems to run continuously for several hours.
- Sound Rental Business Owners: Operators who need their speaker inventory to remain reliable across various rental applications.
- Club and Venue System Installers: Technical teams setting up permanent audio installations for lounges, banquet halls, and fitness centers.
Who Might Not Need High-Power Matching?
Casual users setting up small, active personal systems generally do not need to perform manual matching. Active or powered speakers integrate a custom-matched amplifier inside the cabinet itself, with internal limiters pre-configured by the manufacturer to protect the voice coils automatically.
Suggested Internal Links for DJPrice.in
- Looking for the right power amp? Check out our detailed breakdown of the [Best DJ Amplifiers in India].
- Need passive boxes to pair with your rig? Explore our guide to the top [Professional DJ Speakers for Outdoor Events].
- Want to clean up your audio output signal? Take a look at our [DJ Mixer Comparison Guide].
Frequently Asked Questions
1. Will a 1000-Watt amplifier burn out a 500-Watt speaker?
No, provided the amplifier is operated correctly. A 1000W amplifier provides clean headroom for a 500W RMS speaker. The speaker will operate safely as long as you do not push the mixer or amplifier inputs into continuous distortion or clipping.
2. Is it safer to use an underpowered amplifier?
No, using an underpowered amplifier is often more dangerous for your speakers. When a low-power amplifier is pushed too hard to achieve higher volume levels, it clips. This clipped signal generates excessive thermal heat that can burn out a voice coil quickly.
3. Can I run four 8-Ohm subwoofers on a single standard two-channel amplifier?
Yes, by connecting two subwoofers in parallel on each channel. This configuration presents a 4-Ohm load per channel. Ensure your amplifier is rated to run safely at 4 Ohms and can deliver the combined RMS power required by both subwoofers simultaneously.
4. How do I know if my speaker voice coil is already burnt?
Common signs include a distinct burning plastic smell near the cabinet ports, a scratchy scraping sound when you gently press the speaker cone inward by hand, or a total lack of sound output.
You can verify a failure by testing the speaker terminals with a digital multimeter; a completely burnt coil will register an open circuit (infinity Ohms) or zero resistance.
5. Does matching speakers to amp car audio principles differ from professional DJ systems?
The core electrical physics remains identical, though car audio systems typically operate at lower impedances like 1 Ohm or 2 Ohms to draw more current from limited 12V DC vehicle electrical systems. Pro DJ systems generally operate at 4 Ohms or 8 Ohms using higher AC voltages.
Final Verdict
Avoiding burnt voice coils requires maintaining clean power levels and understanding how impedance impacts system performance. Avoid matching low-powered amplifiers with high-wattage passive cabinets, and monitor your signal meters to ensure your system never enters the red clipping zone.
By investing in an amplifier capable of delivering adequate headroom and verifying your wiring math, your sound system will provide clean, powerful audio reliably for years to come.
1 thought on “How to Match Amplifiers and Speakers Without Burning Out Voice Coils”